Showing posts with label DIY. Show all posts

Thursday, April 11, 2013

Build a Backyard Balance Beam DIY Tutorial

balance beam| balance beam DIY|home balance beam tutorial|Building your own toys|backyard play


Littlest wanted a balance beam in a big way. They cost hundreds of dollars! You can buy a mat to practice on, but its just not as much fun as wobbling your way along a narrow board. 

Voila! The 15 minute home balance beam. It's not high off the ground, however nor is it padded or super-safe. It's just a simple homemade toy - no guarantees for your child's safety if you copy this!

Kevin ran out and picked up an 8 foot long  4x4. I think they are used for fencing. It costs under $10. He sawed two equal "feet" out of scrap wood. He & Danielle nailed them on.  A few minutes later she was dancing her way along her own balance beam that she helped build herself.


Okay, so maybe shoes would have been more useful safety gear than ear protection... 


For a more professional home built balance beam please go to JUST A GIRL.

Friday, October 5, 2012

Quick & Easy Crafts --- No Such Thing!

DIY disasters|How to make candy melt lollipops|Marshmallow Alien Pops|Ballet Slipper Cookies|Cream Cheese Frosting|Do It Yourself Craft


Every time I decide to try a new craft I naively think, "This is it! This will be the one that I am good at; the one that will turn out exactly like the picture in the online tutorial." I get suckered in by articles that state "special tools and materials make this project a cinch.." They never mention that these special tools and materials will cost you an arm and a leg - and take several months to learn to use properly.

For Danielle's upcoming party I think I'm 0 for 5. Let's see... first there was the frosting fiasco. I beat the cream cheese frosting at "medium high speed for 5 minutes" exactly like the bag of confectioner's sugar instructed. I even set a timer so I wouldn't turn the mixer off early.  Only- the instructions weren't for cream cheese frosting and I ended up with a delightful cream cheese soup. It really tasted great - it just ran right off the cake. I poured it into a Ziploc bag and tossed it in the freezer. I figure it will keep and maybe I can use it to ice cookies at some point in the future.


Next I tried the oh-so-easy ballet slipper craft. Seriously? Can anyone dip stuff in melted chocolate and make it look good?!? Most of the things I try look like hairballs my cat might have coughed up. And then the gleeful DIY fairy states that next you just, "pipe on the finishing details.." Ahh! And how do I do that, exactly? My attempt using a Ziploc bag as an icing bag was less than stellar. In fact, after several tries I gave up completely on the adorable ballet slippers and decided instead to serve simple pink sugar wafers (Goya $1.99/package) - no adornment required.

And this was the best I could do!


The third thing I tried to make were the awesome marshmallow aliens. I fell victim to bad blogger syndrome when I wrote" No matter how tempting it is - don't dip them in the food coloring! They will never dry... Trust me on this one." I should have come straight out and said that when I woke up the next morning my test aliens were still so sticky from being soaked in food coloring that they had slid down their little sticks, looking like they had all been lobotomized. I should have been truthful and written that I gave up on that plan and went searching for another, less sticky method of making alien marshmallow pops.

Now imagine these several hours later - looking like they'd been impaled through the head...
Next I thought it would be nice to use up the candy melts since I'd spent $3 on them and already had lollipop sticks.  I had a lollipop mold that I'd bought last year and never used. The pictures on it were lovely. "How hard could it be?" I wondered. I looked up the instructions on line and it was rated "easy". Sounds about right for me....
Wilton's flower lollipops --

The flowers actually were quick and easy even if mine didn't look quite as nice as those on the package.
Tip: Tap the mold to get out air bubbles
or your flowers will look like bugs have gotten to them


I got cocky. I pulled out the elaborate Halloween jack o lantern mold I had also bought last year. (I must have felt particularly ambitious last fall..) I figured that it couldn't be much harder than the flowers. Ha! My poor jack o lantern pops look like The Joker had a field day with them. Despite carefully applying melted chocolate with a tooth pick I had uneven eyes, large misshapen mouths, off kilter noses - and I was following a pattern in the mold! Imagine the mayhem if I had tried to free hand those bad boys.
I didn't even waste lollipop sticks on these monstrosities.

To add insult to injury, when I unmolded them, many of the painstakingly applied chocolate details fell off! In the end I have to ask myself, why did I spend almost $15 and more than an hour's time making 16 flawed lollipops. For about the same price and amount of time I could have driven to a local chocolate shop and picked up an equal number of lovely, aesthetically pleasing chocolate pops.

For a true crafter I suppose there is value in having learned a new skill, produced something with your own hands, and used your time to make something that will bring joy to others. In my case, I have to confess that it really is all fodder for my true hobby - blogging.

If you've been keeping track You'll remember that I said that I was 0 for 5 on this party but I've only listed 4 of my craft disasters... I'm saving one for another time!

Here's to more craft experiments - and more posts. I promise to be more honest with you in the future. ;)
 

Saturday, March 3, 2012

My Dining Room Make Over

How To|Paint over Wallpaper|Remodel
I am NOT a do it yourself-er by choice. I am a do it yourself-er out of financial necessity. I can't see paying $400 a wall to have a professional paint when I can buy a gallon of paint for less than $35 and have $1565 left over to do something else with.

Note to self: Wear gloves.
That said, I am seriously one of the world's WORST painters. I not only get paint on myself but on any adjacent surface whether its been taped, covered with a drop cloth or wrapped in paper. The paint can and will seep under or through any attempts to protect other items in the room. Still, since I apparently can't paint a straight line I cover and tape. Naturally, that means that when I remove the covers and tape I have missed large spots of the wall that needed paint.

Which leads me to go in and retouch. Which means that I get paint on the adjacent surfaces...which means touch up paint of another color...which means I get that color on the wall.... That $1600 quote looks so much more reasonable after I spend nearly a week painting and repainting and in the end, frankly, it looks like my 5 year old painted it. (Which, in truth, she probably did because I figured "why not?")

My dining room has a white chair rail. Above the chair rail is red wallpaper covered with (of all things) palm trees. Below the rail is an odd shade of Army green. Not my taste.  I do like the hardwood floors. It also has one feature that I love - a gold faux finished ceiling. Really cool and unusual. The room originally had a brass chandelier that we replaced years ago with more contemporary lighting, but I never dared tackle the ugly wallpaper and dark paint. 


Until last weekend when I saw this photo. I wanted that room!


Having never repaired or repainted Amanda's room after removing her wallpaper border 6 months ago I decided to commit the ultimate crime of home ownership and paint over the wallpaper. Go ahead, cringe. I know it was wrong, but it was quick  and it made me so happy.

A gallon of oil based Kilz - two coats to cover the wallpaper;  a gallon of Lowes' allen+roth Natural paint and about a week's work equals happiness! The hardest part was painting over the fake wainscotting. Brushes left streaks. Regular rollers created drips. Kevin finally discovered a set of small Whizz rollers designed for painting cabinets that painted all of the indentations and corners of the trim beautifully. Too bad I didn't have them for the first coat...

We removed the plantation shutters to bring more natural light into the dark room. The look is not identical to the first photo. The paint is a little lighter. The goal was to bring the space to a more neutral, contemporary palette.  I didn't substitute new ceiling lights or furniture, but worked with what we had. To finish it off I moved things from other rooms, bought a $70 lamp and some inexpensive artwork from Target. It is not a professional job. There are drips, smears and missing patches. However, the total cost of my makeover including accessories was less than $200.

Now - what can I do with the rest of the money that I saved by doing it myself?


Sunday, January 22, 2012

Washing An American Girl Doll...

American Girl Doll|Washing

Washing An American Girl Doll...


I am not a doll lover. Frankly, they give me the creeps. Barbies and fashion dolls are okay if a little trashy, but large dolls bother me. I hate their eyes - always staring at me.  I was a little scared of dolls even before I saw Trilogy of Terror or any of the Chuckie movies.

I've avoided buying the girls any baby dolls or the very popular 18" dolls. It was easy with Amanda - she preferred other toys. It's more of a challenge with Danielle. She clearly prefers playing with her stuffed animals to the one baby doll that she has so I've never had to confront my irrational fear head on.

However two of her very best friends received American Girl dolls for Christmas this year. I'm not a huge fan of "keeping up" so under normal circumstances this wouldn't be a concern. So what if Danielle doesn't have one?

Then one of the moms mentioned that she was considering having her daughter's January birthday party at our local American Girl Bistro.  Being who I am, I looked it up online. The site said "for girls and their dolls to enjoy a special day together!" So I called the store and asked about whether or not the doll had to be an American Girl doll. While they didn't exactly say "yes" they didn't say no either. The response was that any girl who brought an American Girl doll would get the special treatment for her doll. Anyone who didn't bring an American Girl doll would be welcome to borrow a doll for the duration of the party. Okay, not ideal, but not so horrible. What's wrong with a loaner doll for the day?

Then I remembered meeting friends at a "fancy dress" restaurant. The man hadn't realized that a jacket and tie were required. He spent the evening uncomfortably wearing an over-sized yellow jacket that the restaurant kept for just such occasions. We all felt awkward and out of place. The yellow jacket was as glaring in a room full of dark coats as a Scarlet A. I didn't want Danielle to feel that way if I could prevent it.

Luckily, one of her cousins had saved her American Girl doll from the mid-1990s. Her mother generously boxed it up - along with several outfits!- and mailed it to Danielle. She was lovely and Danielle was thrilled to get the package.

Then I noticed that the doll smelled...off. Musty. I tried Lysol. I tried Febreeze. I looked up American Girl cleaning instructions online. Following them I tried a gentle sponge bath. Then I tried soaking it in the sink... It still smelled weird.

I looked up the American Girl "doll hospital". Basic cleaning costs $24 (plus shipping). I even checked into the cost of a replacement body -$39! More than the price of the knock off doll sold at Target.  Finally, I put it in the washing machine, cringing the entire time at the thought of putting a $100+ doll in the washing machine. Here is what I did:


Step 1: Remove the head. Turns out it's only tied on to the cloth body. Brush hair. Sprinkle baking soda inside head, place in a sealed plastic bag with a small cloth bag full of activated charcoal. Creepy decapitated doll head.. yuck! at least the eyes are closed.

Step 2: Soak the body in the sink using mild detergent (Woolite) and baking soda.

 Step 3: Wrap and tie her in 2 clean pillow cases then into the washer for another rinse and a spin. Somehow I feel a little like I'm drowning a bag of kittens...


Step 4: She survived the washing machine! Now to dry her.
I've moved from the morbid to the vaguely obscene...

I'm drying her upside down to get any water out of the hollow vinyl arms and legs. I figure 24 hours in front of the fan and then a week in a bag with activated charcoal. If that doesn't get rid of the smell... well, I guess that's what perfume is for.


Monday, January 2, 2012

DDIY - I Didn't Do It! I'm not handy either...

PVC Dip Stand|How To Build Your Own
Last year I naively suggested to Kevin that we make each other gifts instead of buying them. We are fortunate to have most of the things we want or need, so this seemed like a good idea when I was surrounded by mounds of torn gift wrap on Christmas morning.

I forgot about our deal until Kevin started producing amazing handmade gifts for me. For Mother's Day and my birthday he gave me pictures that he had painted or drawn himself. I felt like such a slacker!


I began my quest for the perfect homemade gift. First, lets be honest, men are harder to shop for than women. You can give a girl jewelry almost any day and she'll be happy. Many men like outdoorsy activities or sports. Chances are good that they already have the equipment they need. What does that leave us poor female shoppers? Most men hate to get clothes and, frankly, even the most progressive man secretly considers it our duty to provide them with food so home cooked or baked items fall a bit short.

Guys require gadgets; preferably gifts that plug in or at least light up. Short of learning to weld or solder most gadgets were beyond my humble abilities. And then I had my aha! moment. Kevin said in passing that he'd like a dip station for his home workouts. I looked them up online. As far as I could tell them were $200 metal frames. I could make that. Well, maybe not out of metal, but PVC piping seemed like a logical substitute.

First I found a website that described what I'd need to make the machine. Making a pipe dip station like the one shown would cost as much or more than buying one. I did a lot of research to determine that the typical width is 21-24" apart and the typical height is 36".

Thank goodness for the folks at Lowe's! Their slogan is "lets build something together" and they mean it! They let me use their computer to look up the instructions, loaned me a pen and paper to make the calculations and then (best of all!) made the cuts in the PVC pipe for me - for free! All together, the staff spent more than an hour helping me out. The components cost less than $40 and the hard work was done. Bargain!

I came home and this is what I had. Then I had what we'll euphemistically call my WTF moment. Could I really build this thing?!? "Its just tinkertoys for grownups," I kept reminding myself.

What WAS I thinking?!

According to the directions I needed:
  • 8- 90 degree elbows
  • 2- “T”s
  • 2- 12 inch long pieces of pipe
  • 7- 24 inch long pieces of pipe
  • 2- 36 inch long pieces of pipe  
This was my working diagram. Note how scientific I am in my approach.

I was able to get most of the pieces from 2 ten foot lengths of 1 1/4 inch PVC. Each length cost $4.68. I needed a third section of pipe for the 12" pieces. Here were the cuts we made:
 
Pipe #1: cut into two 36" lengths and two  24" lengths
Pipe #2: cut into the remaining five  24" lengths
Pipe #3: cut into two 12" pieces

My first set of elbows was wrong - I needed ones with two wide openings to connect the pieces. Another trip to see my friends at Lowe's. Turns out that I needed "slip" elbows - great! They actually cost about half of what the first set did.  Now the cost of the project was just over $30. Then, oops! I accidentally ended up with three 12" pieces and six 24" pieces. Thankfully, I had left over pipe. I bravely pulled out the circular saw, put on some safety glasses and made my first cut.

Finally, I had all the right pieces in all the correct lengths. Time to build! The first version was exactly to the plan. However, it was a really wobbly. Also the front end was lower than the back because the T's used to stabilize the back actually raised that end up. I disassembled it and hid the pieces back under Amanda's bed.

I thought I could correct this by creating a T intersection on the other side as well. Off to Lowe's for another set of T's. By now I was confident cutting the PVC piping on my own and cheerfully sawed away in the garage. I read all about solvent welding and bought the proper primer and glue. Danielle happily helped me paint on the "pretty purple" PVC primer and we glued the pieces in place.

Then I realized that I'd basically built a cage.  I should have stabilized the sides instead of the font and back. Kevin was going to bump his knees the way this was. To correct it I needed ANOTHER set of T's to connect the ends that were now the sides and the new back. Man! This was getting complicated. Time for another diagram....

Suddenly- VOILA! I realized I could turn the whole thing UPSIDE DOWN and it would be fine - no additional pieces needed. Since I used 24" sections the original handles became the 'feet" and the feet are now the handles. There are days when my own genius astounds me.

Tragically, when Kevin tried it out Christmas morning it was still wobbly and clearly wouldn't work for its intended purpose... It didn't help that Danielle and I had missed two of the joints when we were gluing it together. Poor Kevin almost wiped out. Not quite the present I had planned.


I can see from this product that an angled frame would have solved my problem, but I'm not sure how I could have built one using the available PVC joints. If I had found this ad I NEVER would have attempted this project... Save yourself time, frustration and aggravation and BUY ONLINE. It's the same price ($98 including shipping) through Amazon.com

In case you want to learn how to do dips check out this site. Like many things, I've mastered the theory but can't put it into practice!

Now what to do with the large plastic frame we have in the garage...????

Saturday, December 3, 2011

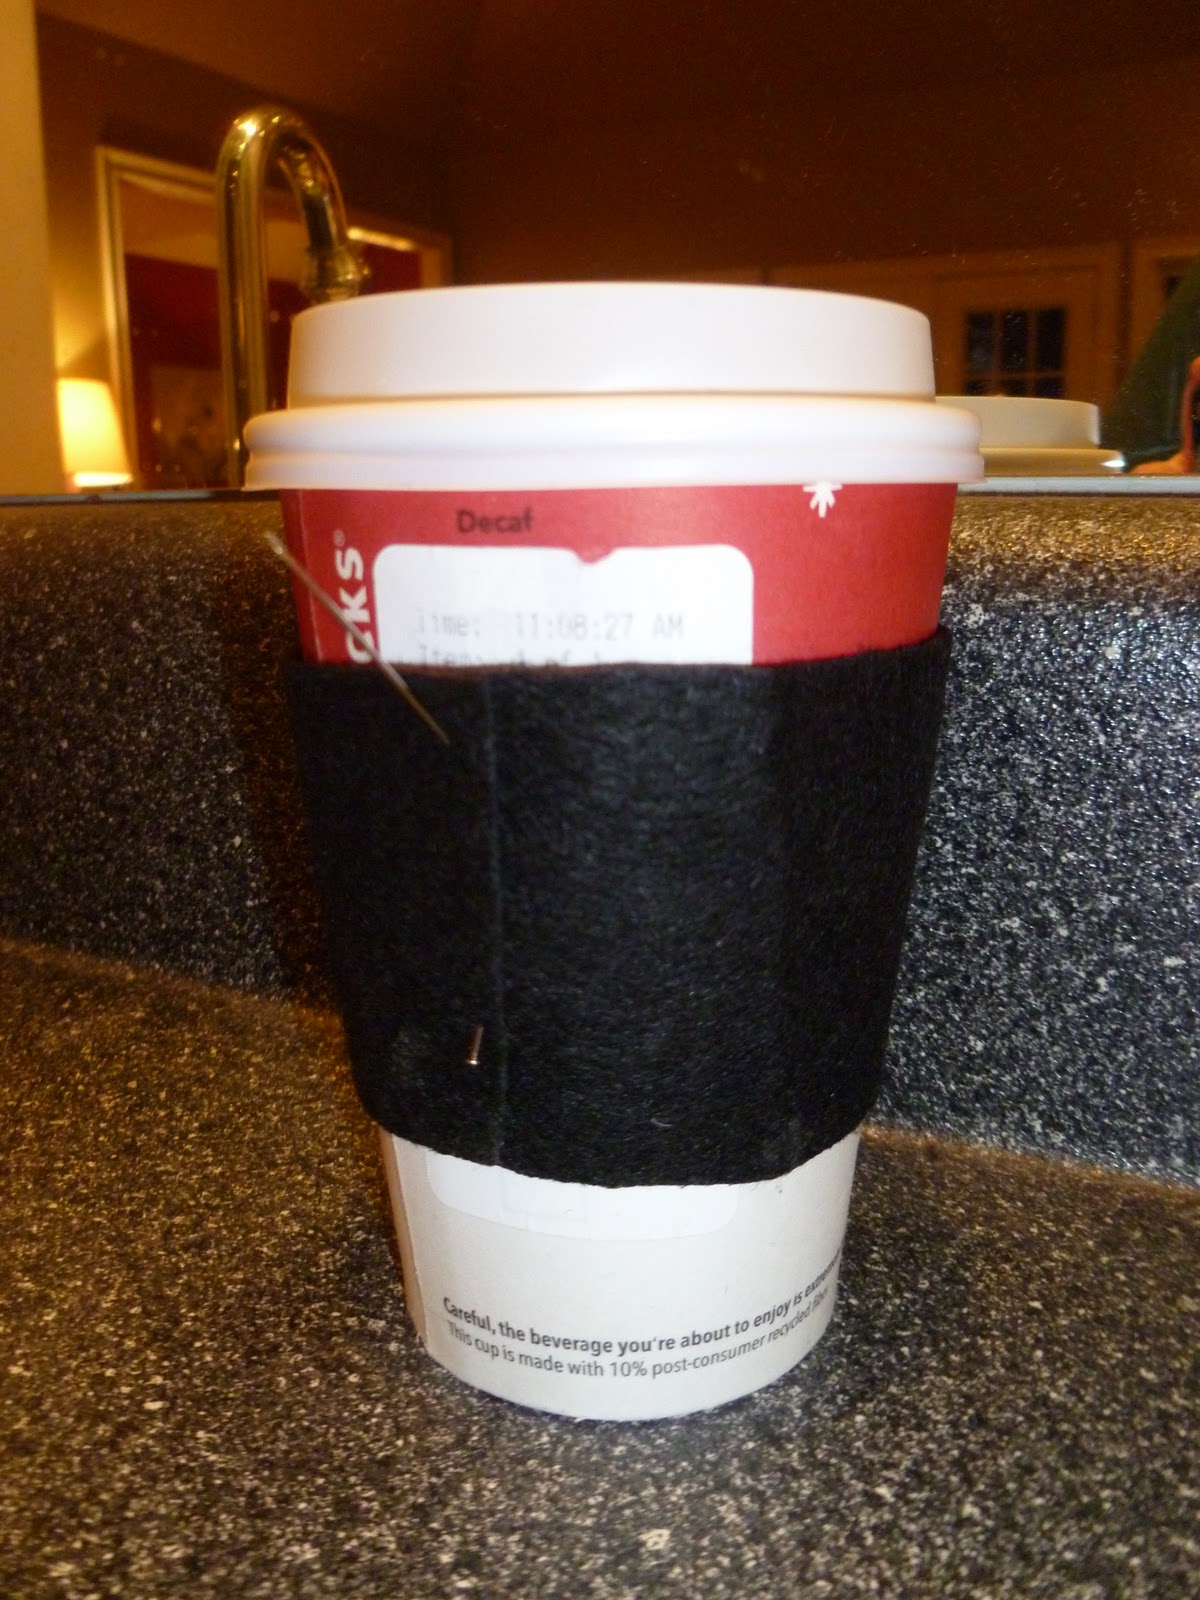
Reusable Coffee Cup Sleeve

Craft|Coffee Cup Sleeve|How To
Try this super easy craft with your kids!

Step1: treat yourself to a fancy to go coffee from someplace like Starbucks

Step 2: remove the cardboard holder and unstick the ends; wash out the now empty cup
Step 3: trace the holder onto stiffened felt (available at Hobby Lobby)
Step 4: cut along the pattern


Step 5: wrap felt around the cardboard cup
Step 6: glue the ends together using Felt Glue and pin until dry


Step 7: decorate with stick on "Felties", ribbon or fabric paints
Step 8: annoy your local barista by ordering ten $5 gift cards to go with all of the sleeves you've made...

Happy Holidays!