She lost her first tooth a few weeks ago. And literally lost it. We have no idea where it went. Once her panic subsided we came up with a plan. She wrote a small, fairy sized note and slipped it under her pillow (with a penny).

Just before she fell asleep she asked me to crack open her window to make sure the Tooth Fairy could get in. There is no doubt she believes.
I think she is losing her belief in Santa and the Easter Bunny due to all of the costumed characters at the Mall, etc. She has a deep seated fear of large costumed characters (and yet we go to Disney almost every year!) Very early on we had to tell her that they were just people dressed up, pretending.
She is positive that the Tooth Fairy exists "because no one can be small enough to pretend to be her." There you have it - irrefutable 6 year old logic.
So it just made sense that we should build a nice little fairy playground in the backyard and a "place for her to rest her wings."

Earth Day seemed like the perfect day to start this project. First, we drew plans. Danielle wanted to build a house, but we weren't sure how to do it. Kevin came up with the best idea- creating one from a small carton of Goldfish crackers. We knew that we definitely wanted a swing, a path, a water feature and "lots of colors." Apparently, fairies love colorful things.

We used an faux cement planter that we had on hand - our first bit of recycling. It didn't have a hole so we layered the bottom with old golf balls to create drainage. We live on a golf course and thanks to some pretty poor golfers in the area, we always have golf balls that we find in our yard just waiting to be reused.

 |
| Lost golf ball... |


We didn't succumb to the temptation to add doll furniture or buy premade decorations. Danielle wanted us to make everything ourselves, "just like Tinker fairies." You can buy absolutely exquisite items for fairy gardens, but where's the fun in that?
 |
| Table & stools made from bottle |
 |
| the "box of rocks" we've collected for crafts |
We made a fairy-sized birdbath from a shell and a golf tee - "A butterfly bath," as Danielle called it. Golf tees also made excellent posts for our bridge and stands for marble gazing balls. We used E6000 or Liquid Nails to carefully glue the items together. The "tire swing" was an old washer from a sink faucet tied onto some twine, hung from a dry branch. Pennies transform into pretty copper stepping stones.
 |
| Making the tiny tire swing from an old washer |
 |
| The "log bridge" for people |
Looking around the yard we finally found inspiration! Since we cleared the backyard a few weeks ago we've been struggling to create a bridge over the dry creek bed. A real bridge is too complicated and too expensive to build. For now, we've been tip toeing across one of the leftover logs.
Why not use a "log" for a bridge in our fairy garden as well? "Easy peasy lemon squeezy," as Danielle would say!
I did take control of the plants a tiny bit. I just didn't want her to be disappointed if they died or overran the entire fairy garden. I chose moss from our yard and thyme from the herb garden as ground covers.
 |
| Took a clipping from this thyme plant |
 |
| In places we have more moss than grass! |
One thing I noticed - it takes a lot more materials than you think it will to fill a container. All of the items and plants are small so you need quantity to create volume. For instance you need a lot of moss for ground cover! It looked like moles attacked our yard. However, a flat of moss isn't cheap, so we'll live with a few bare patches.

There are very few small flowering plants available outside of specialty garden centers. And tiny little succulents which look absolutely perfect in miniature gardens cost $4 each.
We bought a few new plants and flowers. Danielle wanted marigolds for color. Added bonus - the deer won't nibble on them. They look like gigantic Dr. Suess trees in the tiny landscape. She also used Mexican heather, red salvia and one little flowering succulent.
 |
| Tiny tire swing on left side |
Asparagus ferns make nice small scale evergreens. My favorite plant was a tiny eucalyptus "tree" for my garden.

Even with our focus on "reduce, reuse, recycle" this wasn't an inexpensive project. I spent approximately $35 on plants and potting soil for the two fairy gardens. (Yes, I made one, too. I couldn't resist.) Moral of the story: rocks and pebbles are your best friends. I used a 10 cent 3x3 tile to create a "patio" in my garden to take up empty space.
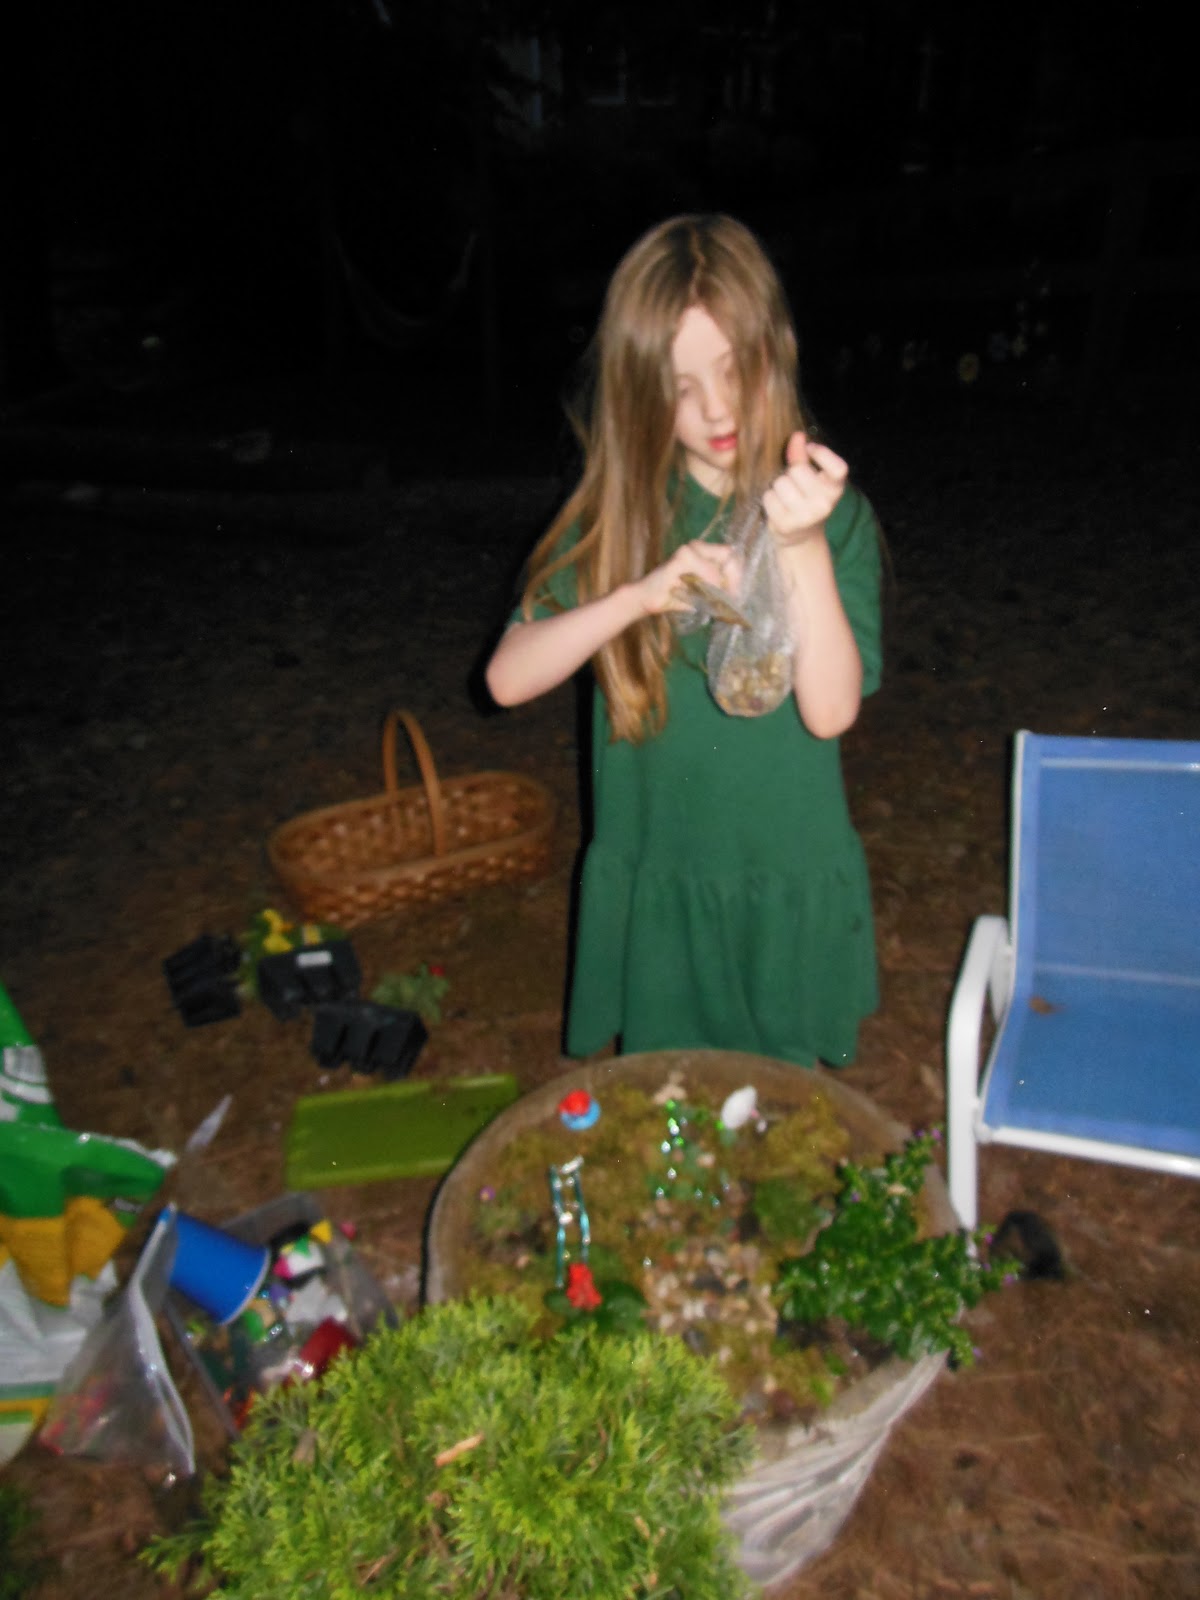
Danielle spent every afternoon after school working on her fairy garden - and you know how exhausting Kindergarten can be! This was a real labor of love as she crafted a tiny hammock, a banner for the fairies and other special details. She literally worked night and day on creating the perfect fairy playground!

 |
| A few final touches on a Friday night... |
It was such a joy to spend the afternoons creating these little wonderlands together. Now we get the added fun of playing in our creations.


I know this is the time when little additions like Christmas decorations and doll furniture will find their way into the garden. We'll continue to make things for the fairies as the seasons change. I can see the fairies needing a larger swimming pool in the summer or Halloween decorations in fall. What goes into her fairy garden is only limited by her imagination at this point.

Danielle was very proud of her fairy garden so we entered it in The Magic Onion Fairy Garden Contest for 2013. I know that a 6-year old's creation doesn't stand a chance of winning against the grown ups, but I'm thrilled to give her the opportunity to show off her creativity.

Why don't you make a fairy garden of your own and enter?
I'd love to see the results!
 |
| Even our cat believes in fairies! |


