Monday, February 25, 2013

Budget Walt Disney World - Bargain Souvenirs for Kids

free WDW souvenirs|bargain Disney souvenirs|Kidcot FunStops|EPCOT|Animal Kingdom Discovery Clubs|transporation Trading Cards|Sorcerers of the Magic Kingdom|free personalized WDW maps| autographed card|autographed Disney photo|EPCOT passport|Animal Kingdom Passport|Disney drawing class
Four previous trips to the most magical place on Earth have taught me a few things. Not least of all that just about everything at Disney World is expensive. For instance, a "quick service" lunch entree (no drink) is about $10 for an adult portion and  $5.50 for a child's meal.
 
Kids meals are only for children under the age of 9. While your 10 or 11 year old might be able to pull it off (and no one ever asks) my 14 year old can no longer get a kids meal. That means a "bargain" lunch anywhere on Disney property is likely to cost our family of 4 about $50.

Now the obvious budget solution is to bring your own food in. Disney doesn't mind. I, however, mind lugging a 20 pound backpack around in 90 degree heat. I really don't want to carry 4 sandwiches, 4 water bottles and a bunch of snacks around for 6-8 hours. I could bring in  a back pack and store it in a locker. Instead we opt to buy snacks at the Parks then return to our rental house for lunch and a swim in the middle of the day.

If I can, I try to walk into the parks empty handed, without even a pocketbook. I wear a lanyard with our tickets, a credit card, some cash and my photo ID in a plastic pouch. I stick my phone in a pocket and a camera in another pocket. Not bringing a pack into the park means we get to enter through the "no bags" line. One less line to wait in!

I still wear the lanyard I bought on our first trip.

We sometimes manage to walk out empty handed as well. I try to limit souvenirs. We deliberately don't enter the shops on Main Street of the Magic Kingdom. We've never been to Downtown Disney. I figure that we can buy Disney merchandise online or at the mall at home, but we can only ride Dumbo while we're at the Magic Kingdom. I don't want to waste our time shopping.

Here is another of my weird, but successful, ideas. To save money I get some "souvenirs" in advance. I'm not denying that I will still buy souvenirs in the Parks. I'm also not denying that I will probably spend more on these souvenirs than I should. I do have a few money saving suggestions when it comes to souvenirs.

Souvenir Tip #1: Before you go order the  free customized maps from the Disney site. The maps come with your family name printed on each one.  You can chose from two different styles. You can also order a free Disney planning DVD.


Write a letter to Disney and get your child a free autographed photo or postcard as a surprise!

Another suggestion: Join Disney Movie Rewards. Even if you don't remember to enter the points for your movies there are lots of fun free things that you can get from the site liek printable stickers. For instance, we got an adorable Quad Mickey Printable Iron-on for 5 points (you get 25 for just signing up). Can you say adorable matching T-shirts for less than $4.00 a piece? 


We were also sent a link to free printable posters (no points required). You can print them on 8.5x11 paper or 8.5x14 legal size paper.


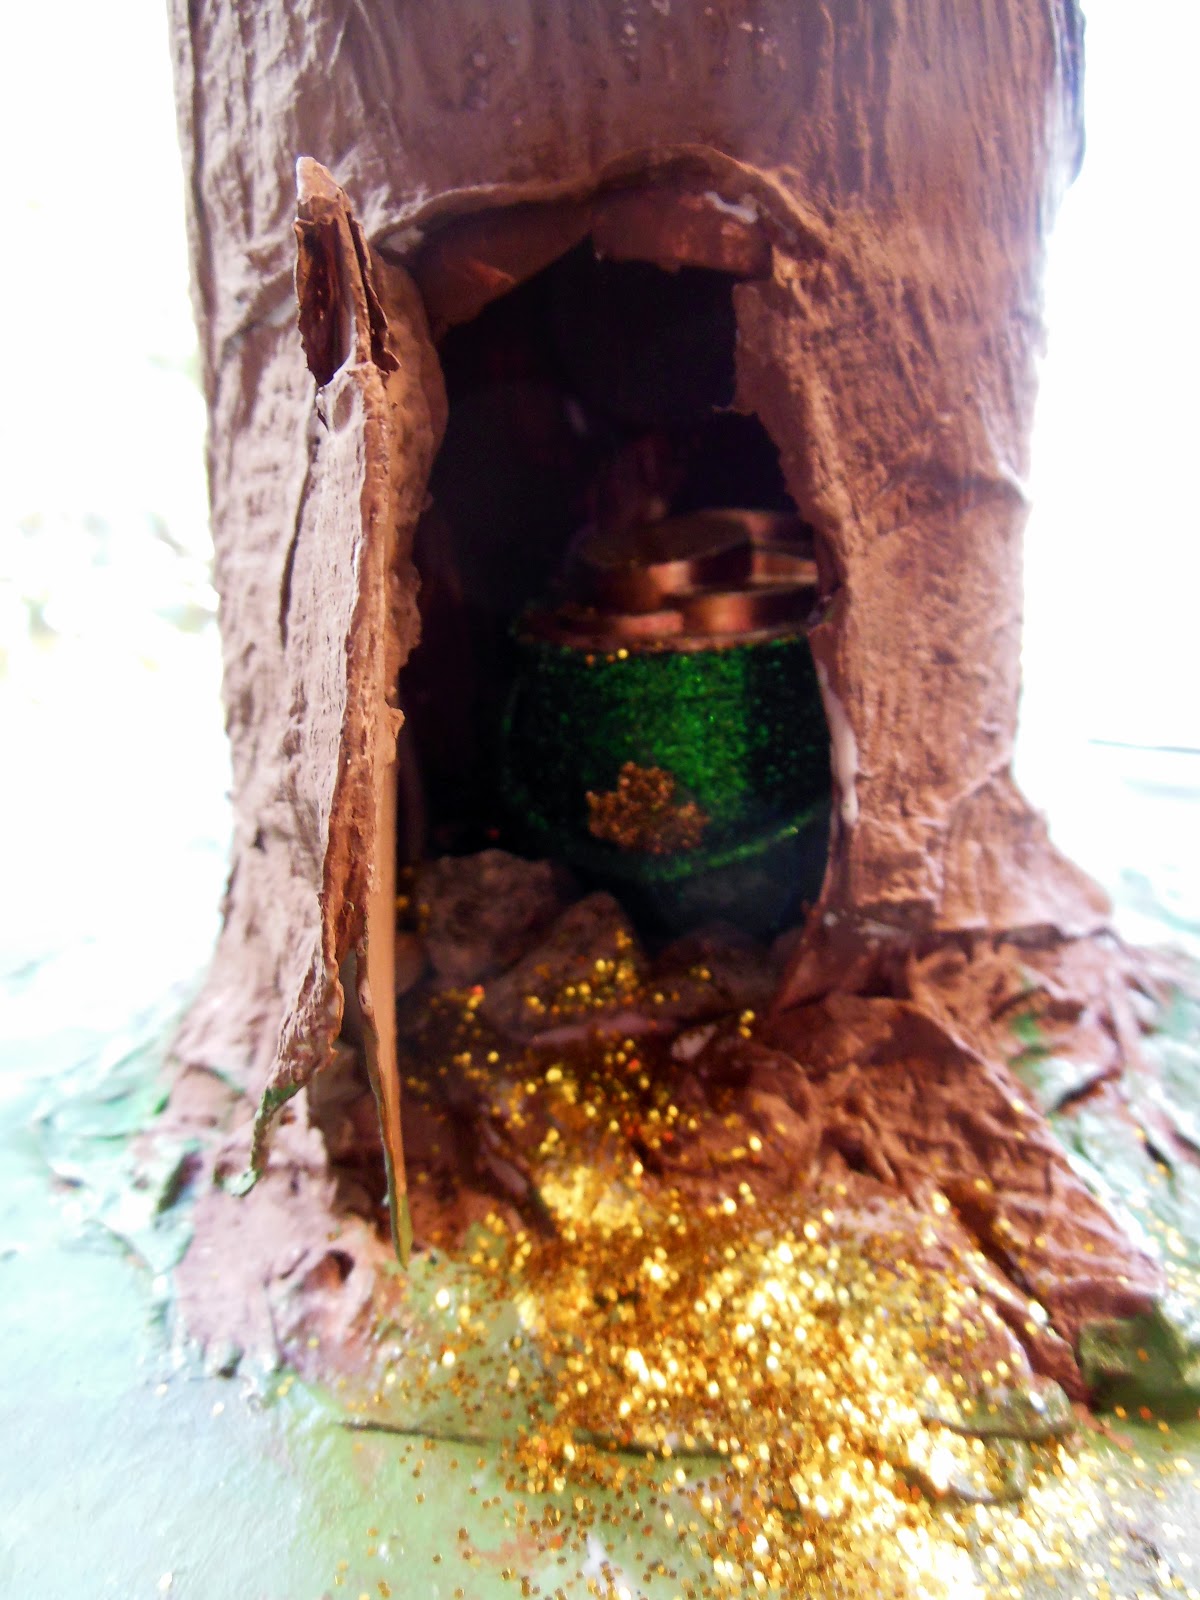
Souvenir Tip #2: Stock up on Disney merchandise before you go and give your kids small surprises each day. 

I spend about $25-30 for everything that I buy in advance for my 2 girls- about the cost of one toy at Disney.  Typical surprises include glow sticks, fancy candy like swirled lollipops and Disney themed merchandise from local stores like WalMart and Dollar Tree -or sale items from the Disney Store. If you carry a backpack you can bring a few of these with you every day and distribute as needed. Alternatively you can give them to your kids before you head out for the day or as a surprise when you return to your room, house, etc. in the middle of the day. I've heard other people refer to these as "Mickey" or "Tinkerbell" gifts.

See my earlier Magic Tips post for the last trip's surprises. They included a $5 Belle hat from WalMart that Danielle wore nearly every day.

The colorful maracas cost about $5


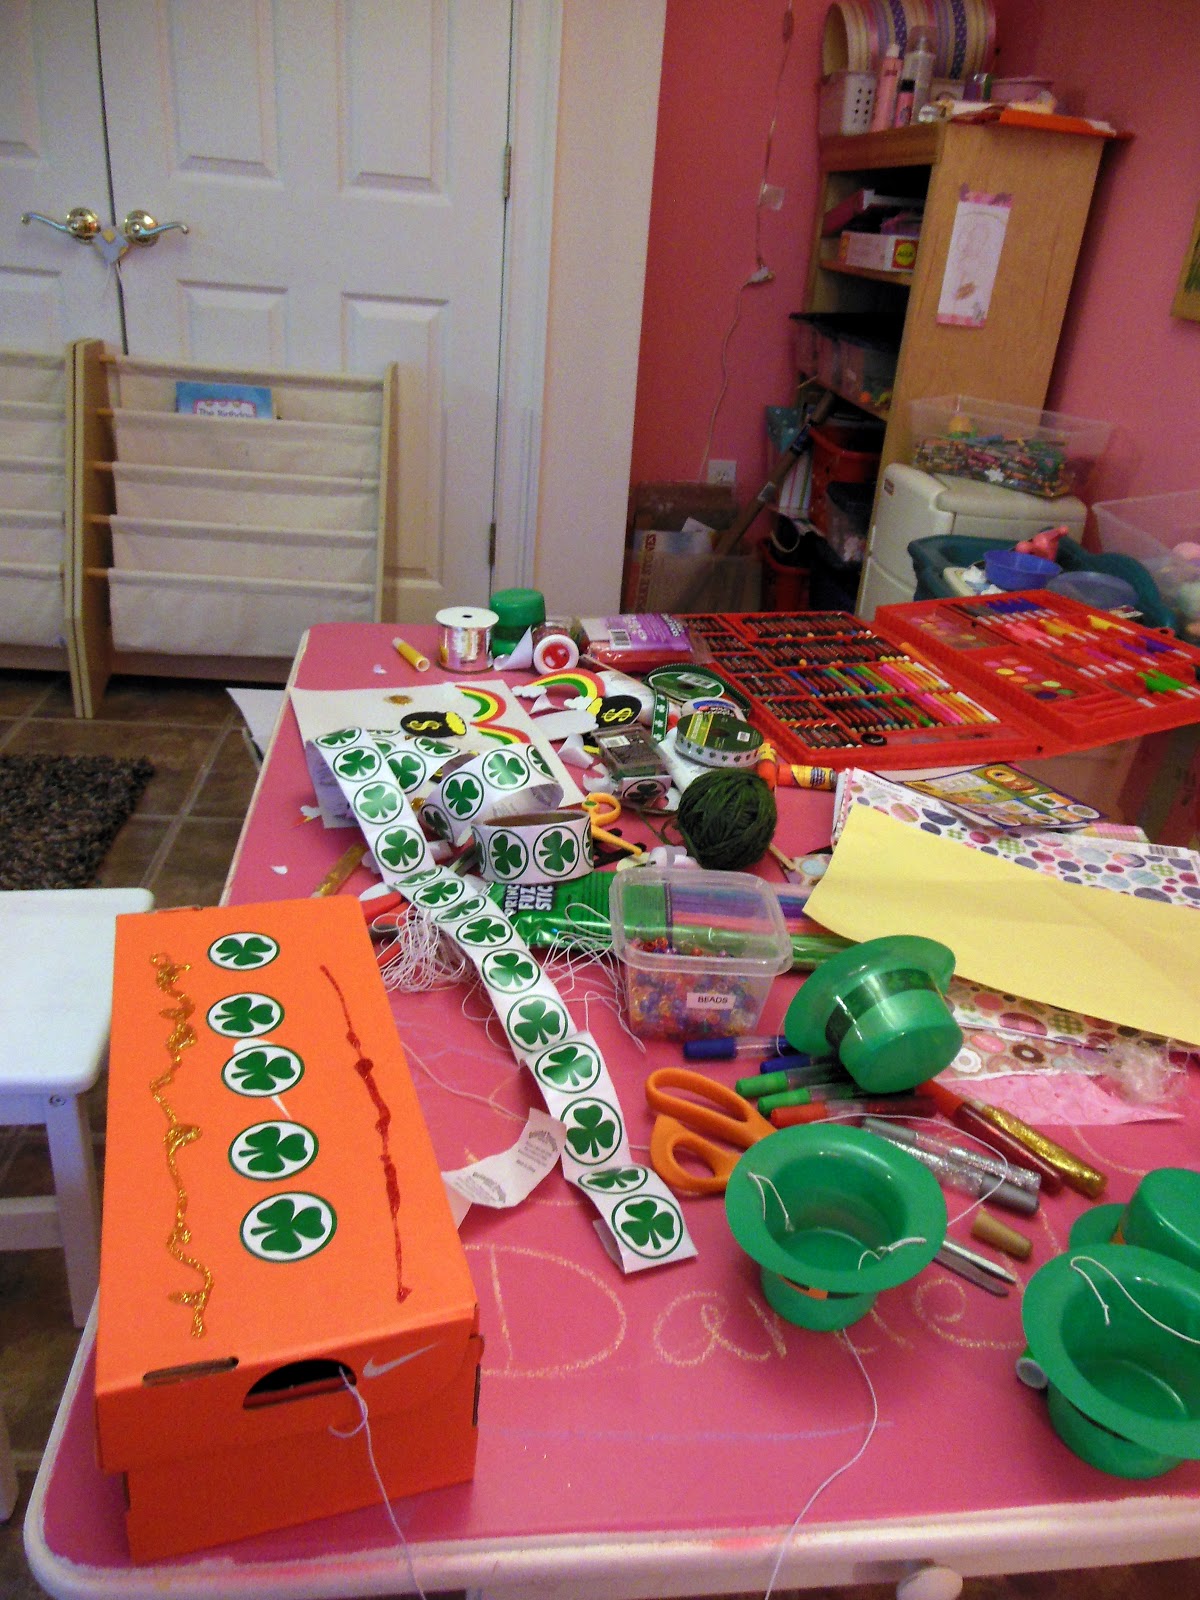
I bought slightly different items for each child based on their ages and interests. I have girls so my purchases tend to focus on princesses and fairies. Most of these items also came in ToyStory, Cars or Mickey Mouse versions. This time I spent $9 per child. I'll spend another $2-3 each on candy and glowsticks.

I got seven items - one for each day of our trip. I bought Danielle her own lanyard for this trip as well as a jump rope, bubbles, coloring kit, chalk board, puzzle, etc.  I wanted to give her little things that she could play with at the rental house or in the car. Here are her surprises for this trip:


Souvenir Tip# 3: Collect something other than trading pins.
 
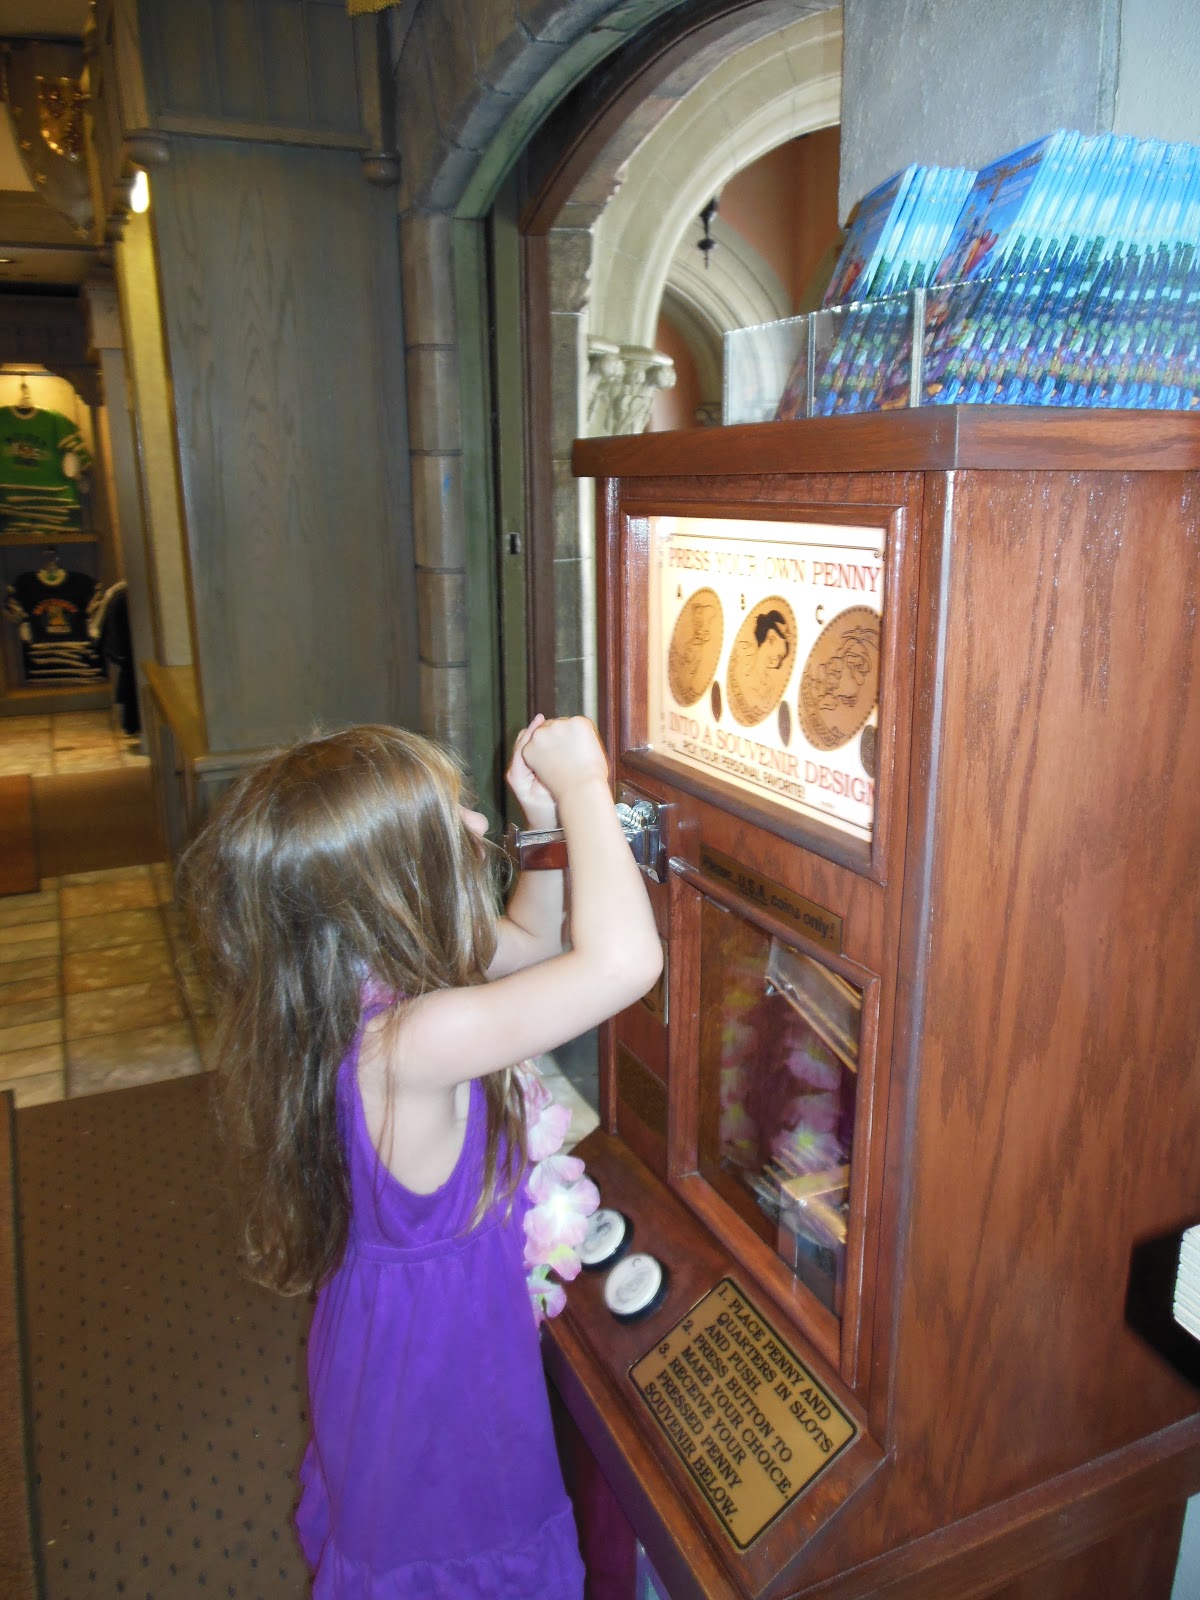
Collect Napkins, Autographs or Pressed Pennies. The trading pins cost $10 each and your kids will want several as well as a lanyard to wear them on. Autograph albums and pressed coin books each cost less than $10 at any Disney Park or Resort. Buy each child one or the other on the first day of your vacation. Collect autographs from characters or hunt for pressed penny machines. Of course, this defeats my "enter empty handed" strategy...however, if your kids are just carrying a book you can still walk through the no bags line. We bring ours back trip after trip until they are filled.


Characters will also sign postcards! make sure your bring a fat marker or a Sharpie - paws have a hard time holding tiny pens. You can pick up inexpensive character postcards anywhere in Orlando - typically 3 for $1 at the drug stores like Eckerd.  Have your kids mail the postcards to themselves with a note about what they did that day.

 
Souvenir Tip #4: Play games!

We've found cast members hosting games at the various parks and even the Ticketing & Transportation Center. Stop for a few minutes of fun tossing a bean bag or a recycled bottle. You'll get some free Disney themed stickers - and a chance for a special memory that most people walk right past.


Souvenir Tip# 5: Collect free trading cards. There are 2 types that you can get just by asking nicely.

First - Sorcerers of the Magic Kingdom is a game that takes place at locations all over Magic Kingdom. To play you need a pack of "spell" cards. We saw this on our last trip, but didn't know how/where to get involved.

The cards feature Disney characters ranging from Dumbo to Rafiki. I think there are 70 in all.

You can get the cards from the Fire Station next to City Hall on Main Street, USA or behind the Ye Olde Christmas Shoppe in Liberty Square. You'll also get to watch a tutorial on how to play the game. It's a fun way to explore the park- or you can just collect the cards.

image from Disney.com


Second- There are a number trading cards that you can get from Disney transportation operators. The bus drivers will only have the bus cards, and the monorail operators will only have monorail cards, etc. Cards feature a picture of the monorail, ferry, etc. and a Disney character.

To get a card, politely ask the driver if they have any transportation trading cards. Don't be too disappointed if they say "no". They only get a limited number, so they may not have any when you ask. Don't forget to thank them if they give you a card.


Souvenir Tip #6:  Get a Duffy the Bear "passport" at EPCOT. Kids can carry it from country to country, getting stamps and coloring on it.

I have no personal experience with this but I've read that you can get some other free souvenirs at EPCOT. For instance in 2013 you can make a piece of paper at  Innoventions East. The exhibits at Innoventions change every few years, but there is always at least one where you can make something to take home.

Souvenir Tip # 7: Visit the  Animal Kingdom Kids Discovery Clubs.

Kids receive a free activity "passport" which is stamped at each station. There is a bonus if your child completes all six activities. Check out Disney-pal.com for a preview of the prize for getting all 6 stamps.

Souvenir Tip #8: At Disney Hollywood Studios you can take an animation class where you learn to draw a Disney character. You then get to take home your own artwork.  How good a souvenir this is depends on how good an artist you are.

Souvenir Tip #9: If you must buy something - and you probably will - there are a lot of really unique souvenirs that aren't just mouse ears.

Think about what you might enjoy once you are home. EPCOT is one of my favorite spots for unique souvenirs. We love the necklaces we had made from the Pick A Pearl in Japan. Another special souvenir is the  puzzle made from a family photo taken against a Disney backdrop that we got at ImageWorks .

Tip # 10: Before you go buy a misting fan with a shoulder strap online or at a local drug store. Not really a Disney souvenir, but something you will need, trust me.

It will cost about $8-10 which seems absurdly high - until you get to Disney where they sell them for $17 a piece. This little gem can be a life saver while waiting in long lines. Fill it with ice water in the morning to keep the water cool all day. Normally Danielle carries ours slung over her should like a purse. Again, its not a bag so you can bring it with you every day without having to go through the bag check line.


Sunday, February 24, 2013

Princess Breakfast at Walt Disney World EPCOT - Akershus in Norway

EPCOT|Akershus|Princess breakfast|princess photo|WDW dining|Disney|character dining|Mulan|Cinderella|Belle|Aurora|Sleeping Beauty|Jasmine|Snow White|Princess Meet|Character meet
We have been to the Princess Breakfast at the Norway Pavilion three times. Obviously, we like it. This is the first year we don't plan to go. Sadly, I think the girls are past their Princess stage.

You will need to pay for park entrance to eat at the Norway Pavilion. If your reservation is before the official park opening, you will be met (as a group with others eating at the same seating) by a guide who will lead you back to Akershus.

It is a long walk! Be prepared for about 1/3-1/2 a mile trek. Wear comfortable shoes. If your little princess is in her gown, complete with tiny plastic high heels consider having her wear sneakers or sandals until you get to the restaurant.

The dining room at Akershus is wheelchair accessible. We've never had a problem getting Amanda seated at a table. They tend to put us in a corner so we don't block traffic, but the princesses never miss us!

There is no waiting area inside the restaurant. Instead you will stand around outside until your group is "announced" by a page. It is fun to hear "The Royal McGrath Family" be called out.

Its usually a hot wait. You can kill a little time in the shop,The Puffin's Roost. There is a Kidstop inside so your kids can color a paper Duffy the bear and get the Norway stamp. There is some nice merchandise in the shop -it's not all trolls! There are beautiful straw Christmas ornaments and nice clothing. Amanda got a great dress last year. (It's the navy polo she's wearing in all of these photos)


The food is good,but not great. There isn't a huge amount, either. Make sure that you fill up on items from the buffet. Your server will bring a platter of bacon, sausage, scrambled eggs and potato casserole to your table as well as any beverages you order. Anything else you want can be found on the buffet. There are several types of fruit and pastries as well as a few other items such as cold sliced salmon. One nice note, you can ask your server for to go cups and you can start your day in the park with a "free" drink in hand.


The reason to go to the Princess Breakfast is to see the princesses! When you walk in you will be photographed with one of the princesses (often Belle in her yellow ballgown). Your photo package is included in the price of the meal and will be delivered to your table while you eat.

At the start of the meal there is a "princess processional" when all of the princesses enter and the children are invited to parade around the restaurant with them. Neither of my girls have ever been interested in doing this, but it looks very cute.


The princesses walk through the restaurant. visiting each table and talking to the guests. Different princesses appear at each meal. During the three times we've eaten there we've met:
  • Belle
  • Mulan
  • Jasmine
  • Ariel
  • Aurora (Sleeping Beauty)
  • Cinderella
  • Snow White


Yes! I love the Princesses as much as my girls do.
 P.S. If you don't want to splurge for a Princess meal - or just can't get enough of them! - you can search the WDW site for character meet and greets. Just select Entertainment and click on Princess and the Park you'll be visiting. You'll see where the various Princesses can be found.

Thursday, February 21, 2013

My Hollow Tree Leprechaun Trap

St. Patrick's Day|Leprechaun Trap|Hollow Tree Leprechaun trap}Recycled Materials Leprechaun Trap|St. Patty's Day
Clearly, I don't have enough to do with my days.. at least this morning I didn't. I could have done the dishes. I could have folded laundry. I could have made that doctor's appointment I've been putting off or gotten my car emissions checked. Instead, I built a leprechaun trap.


I plan to use this as a centerpiece at my St. Patrick's Day party in March. I'll drop a battery operated tea light inside to illuminate it and surround the base with Easter grass.

I'm sure that the leprechaun traps the kids make at the party will be much cuter and more imaginative. I'll post pictures of their masterpieces next month.

My materials mainly came from the recycling bin and things we had around the house:
  • an empty wipes tube
  • paper towels or Kleenex for papier mache
  • a paper plate cut to form an arc for the rainbow
  • acrylic craft paint
  • pot of gold floral pick from Hobby Lobby (less than $1)
  • glue
  • pebbles
  • glitter
  • green paper basket shreds
 
 
First I cut a small door at the bottom of the wipes tube. I did this so I could reach in and place the "bait". I'll put bars or something across it later so the little leprechaun can't escape.
 
 
I made a paste from 1/4 cup flour and 1 cup of water. I soaked 3 or 4 paper towels in it and wrapped the tube. I thought this might make it easier to paint. It also gives it a bark-like appearance. I stuck the "tree" on to a piece of cardboard so I could make "roots".
It also contained the mess!
 

I let my hollow tree dry overnight and then painted it brown inside & out.

When the paint was dry I filled the center with pebbles from the yard, a tiny cauldron of "gold" and lots of gold glitter.
 
 
I made a glitter path leading to the hollow tree to entice the leprechaun.
 
Here's the trap! The leprechaun won't be able to get in the little door so he'll climb the tree. He'll spot this gold rope and use it to climb down into the tree. When he does - snap!- his weight will pull the trap door (one side of a spool of ribbon) shut.
 
 
I don't know if it will catch any leprechauns, but it certainly interested our cat!
 

The Kids Masterpiece


Tuesday, February 19, 2013

Our SARPE Saga - The (Dead End) Road to Surgery

SARPE|Surgically Assisted Rapid Palate Expansion|Kaiser HMO|Kaiser HMO Negative Review|UPPP|craniofacial surgery|special needsAbout a year ago I broke down after trying to get Amanda seen by the Craniofacial Team at Children's Healthcare of Atlanta (CHOA). I sobbed on the phone,"Please just look at my child."
 
After her lung collapsed in 2011 her pulmonologist suggested that she be seen by the craniofacial team at CHOA. I was beginning to feel a desperate need to at least have her looked at. I'd been trying to get Amanda in to see the team of specialists for most of her life. However we were always turned down - not by our insurance - but by the practice. It seemed that she somehow didn't meet their threshold for care, even though they had never seen her. So for 14 years we had struggled with breathing issues and feeding issues on our own.
 
Kevin realized how important this was to me and stepped in. He has an amazing ability to logically persuade people to do what they should do. He was able to determine what I call "the magic words" to get Amanda admitted for an assessment.
 
Once we were in we were seen by three specialists: a plastic surgeon, an orthodontist and a dentist. It was an oddly cryptic appointment. They all looked at her. They took photos of her face from several angles. They left us alone in the room while the conferred.
 
The plastic surgeon came back into the room and announced an extensive surgical plan for correcting Amanda's mouth and nose. Honestly, I was surprised. I thought they would just give her some sort of braces - especially after the orthodontist looked at her.
 

She has a very high, arched palate. I can't fit my pinkie into the roof of her mouth. It obstructs her breathing. It prevents her from being able to retract her tongue into her mouth, which creates another set of issues. For instance she is on a semi soft diet because she never developed rotary chewing or the ability to swallow completely.

I didn't realize the extent of what was planned until I read the follow up report from the team. I was surprised to read the words "complex set of issues."

First Amanda was scheduled for a surgically assisted rapid palate expansion and an uvulopalatopharyngoplasty (no wonder they shorten that to "UPPP")


A plastic surgeon was going to cut the roof of her mouth and an orthodontist would insert a palate expander opened to its maximum width. At the same time the surgeon would remove her tonsils and some of the back of her palate that is blocking her airway.

While this sounds horrific I could see the need for it. So we began our journey to craniofacial surgery.

It seemed fairly straightforward in April, 2012. Kevin tried to take Amanda for a sleep study to document her sleep apnea, but she kept pulling the electrodes off in her sleep. After a few hours they were sent home.

Next I took Amanda to the craniofacial office and they took an imprint of her mouth to build the palate expander. To do this they made up some pink plastic material and stuffed it into her mouth. She gagged horribly, but they got it done.


This is a palate expander

All we had to do then was wait for our scheduled surgery date in late May.  However, the night before our surgery we received a call that the surgery had been denied by Kaiser HMO.  Kaiser required a CT scan before approving the procedure.

Of course, Amanda won't hold still for a CT scan so it had to be scheduled under general anesthesia. Luckily, we got an appointment within a week. So we got up at 5 AM and headed to the hospital. After 5 hours at the hospital the anesthesiologist decided that she couldn't take the risk of putting Amanda under for the CT scan because there was an order for an MRI from the previous fall that had never been completed.

The irony is that the MRI was supposed to be performed under general anesthesia so the risks were the same, regardless of which test came first. Still, the doctor refused and sent us home. 

Then we had to go back to the neurologist who ordered the original MRI, get a new MRI ordered, approved and scheduled. Luckily the CT order was still good and I was able to schedule both tests at the same time. Amanda only needed to go under GA once that way. The first available date was at the end of August 2012.

The tests went well, but Amanda came back to the recovery room cyanotic.* Her lips, nails and the area around her eyes were all bluish gray due to lack of oxygen. She remained on oxygen for several hours until her pulse oxygen level returned to normal.


The surgeon was confident that the procedure would be approved. Amanda had to go through the awful molding process to create a new palate expander since the first one was either missing or they thought it wouldn't fit. (I'm not sure which was the actual reason.) This time Amanda knew what was about to happen and wanted no part of it.

The first time they tried to ram the molding material into her mouth she bit the technician.  The tech brought in back up to hold Amanda's mouth open and the two of them tried again. It was horrible to watch Amanda try to writhe away from them, choking and gagging. Finally they got it done.

Then, we waited for the approval from Kaiser HMO. We waited nearly 2 months for a decision.

Surprisingly, in late October 2012 the surgery was denied a second time. Kaiser HMO deemed it "cosmetic." Personally, I believe this was based solely on the fact that the doctor scheduled to perform the surgery is a board certified plastic surgeon and Kaiser unilaterally denies coverage for plastic surgery.

Now were are waiting the results of our second appeal. I've sent Kaiser the photos above as well as a video demonstrating her obstructed breathing. I have no idea if it will be denied again - or what we will do if it is. 
 
Note: the day I wrote this I got the final denial from Kaiser HMO in the mail. I'm not sure what we'll do now....I suppose that we will continue to watch our child struggle to breathe and eat  for the rest of her life.

*this link connects to a 38 second video of Amanda post-MRI - you can hear her obstructed breathing

For more on the proposed surgeries please read my earlier post, My Informal Medical Training.
 

Monday, February 18, 2013

Post MRI under General Anesthesia

Cyanotic|obstructed breathing|Pierre Robin syndrome|Kaiser HMO|SARPE|UPPP|apnea|Sleep Apnea
This post is for the benefit of medical professionals reviewing our appeal for surgery.
 
This is the roof of Amanda's mouth (palate). It is what needs to be corrected surgically.


Amanda pre-anesthesia, alert and happy


Post anesthesia, note the gray around her eyes
 
 
On oxygen, breathing still shallow and obstructed


Sunday, February 17, 2013

The 51 cent Walt Disney World Souvenir

Walt Disney World|best Disney souvenir|free WDW souvenirs|pressed penny| crushed penny|pressed coin|Disney coins|inexpensive Disney Souvenir
Huh? A Disney Souvenir that is under a dollar? And isn't just a napkin from the restaurant where you had lunch?

Sure! Crushed pennies.  I admit that at first the idea of spending 50 cents to destroy your own penny sounds weird. However, it is a great way to solve a case of "Can I have..."

Instead of buying a $10 toy at every resort and park we go on a quest for a pressed penny machine. Even if we find 3 or 4 at a Park we've still only spent about $2.00. 


I've learned that the best way to carry coins for this project is to fill a small gumball machine container with an alternating pattern of  2 quarters and one penny. Each container holds 8 quarters and 4 pennies. That way you always have the correct change and they are easy to find in a backpack or purse. It's also not as heavy as carrying around a filled MnMs tube.

Walt Disney World Railroad Main St. Station

Crushed pennies are a great interactive souvenir. First there is the fun of searching for machines.


Sometimes you have a turn a handle to crush your own penny.

Then the fun of picking a character - and finally the thrill of watching the penny get squished!


I love that Disney World even places penny machines in some of the stores. The cashiers are always happy to make change so you can use the machine. They even go out of their way to find a super shiny penny. What an easy way to get your child out of the gift shop without spending a fortune. .(The Belle hat that she wears everywhere came from WalMart before our trip.)

Danielle collected 11 pressed pennies during our last trip to Walt Disney World. We bought her a special Tinkerbell book to keep her collection in. The book came from the gift shop in the Polynesian Resort. The grand total for our pennies came to $5.61 - plus about $10 for the book. Bargain!

The book has room for 48 pennies ($24.48 worth) and 6 larger coins so your total can creep up quickly. We, however, have plenty of room left for future trips.


You can buy an album online before your trip, but they are about twice the price of buying them on Disney property. Don't worry! Most of the gift shops carry at least one variety.

We've discovered that there are penny crushing machines at most tourist attractions. Danielle's collection has expanded to include pennies from local museums and the zoo.

You can turn this into a serious collection, searching for missing or special coins and going out of your way to locate machines in more remote locations. We, however, prefer the thrill of the hunt!

Tips:
  • Use pennies that are dated before 1982. These have no zinc in them and press better.
  • Press the heads side up so the monument doesn't show through
  • Clean the pennies in a little bit of vinegar before you pack them so they are shiny.
If you need a map of the locations of the machines at the various Walt Disney World Parks- here it is!

For a detailed description of pressed coins at Walt Disney World, including the locations of machines go to www.presscoins.com


How to Get an Autographed Photo from a Disney Character

Disneyland|Walt Disney World|princess photo|autographed postcard|autographed Disney photo|signed Disney character Photo|personalized Disney character photo
What could be better than collecting autographs from the various characters you meet at Disneyland or Walt Disney World?

How about a personalized, autographed photo or postcard from your favorite character?

I'm going to request a free autographed picture of a Aurora for Danielle. Amanda already has pictures from Mickey & Belle, that I requested prior to her back surgery years ago, but Danielle doesn't have any yet. 


These are framed, hanging in the girls' bathroom.

To get a signed (black & white) picture, just send a request to:

The Walt Disney Company
Attn: Fan Mail Dept
500 South Buena Vista Street
Burbank, Ca 91521


or to get a signed postcard, send a request to:

Walt Disney World Communications
P.O. Box 10040
Lake Buena Vista, Florida 32830-0040


I called Disney Guest Information at (407) 939-6244 when I wanted to get the pictures for Amanda. The good folks at Disney sent her photos very promptly because she was having surgery. I've heard that it typically takes 2-3 months to get a response, so plan in advance!

Disney Junior - Live on Stage! Review

Disney Jr|Disney Junior Live on Stage|Doc McStuffins|Sophia the First|Jake and the Neverland Pirates|Mickey Mouse|Little Einsteins|live show|puppet show|Walt Disney World|Disney Hollywood Studios
Every time we visit Hollywood Studios we go to see the Disney Junior show. Danielle may be 6 but she hasn't quite outgrown Disney Jr. yet. She'll be thrilled to see new characters from Doc McStuffins and Sophia the First in the live show. Last year she asked me to take a picture of a Doc McStuffins poster!

Seeing Doc McStuffins in the show will be such a surprise. The show was one of Danielle's highlights from the last trip.  She still has the "gold doubloons" that rained down from the ceiling at the end of the show.

 
diving for the doubloons
 

In the past we because of the wheelchair have been admitted through the large double doors, but last year we waited in the regular queue with everyone else. The line wasn't too long. While it was hot, there were overhead fans to keep you cool and strategically placed TVs running Disney Jr. shows to distract the kids.


If you get there early you'll have a chance to meet some of the life size customed characters before the show.

When you get in, the theater is dark. If your party has a wheelchair you will be asked to stay in the back so you don't obstruct any other's view. There are no seats - everyone has to sit on the floor.


Amanda loves all of the shows! And it is nice to be in an air conditioned theater.
 
This was the third time we'd seen the show. The main plot is a birthday party for Minnie. It is a puppet show so the characters on stage are only about 2 or 3 feet tall. There is one live actor, who comes down from the stage to interact with the audience.


I found the live actor's voice grating, but the characters were cute. In addition to the Big Five there were characters from Handy Manny and Little Einsteins. These characters may have been written out for the new characters from Doc McStuffins and Sophia the First.
 
 
In 2012 the show also  featured characters from Jake & the Neverland Pirates.


Here is a short clip from the show we saw in 2012.
(You can decide for yourself if the girl's voice is annoying.)
 

We like the Disney Junior Live on Stage show, but it is definitely geared toward preschoolers. It is  interactive and fun for the kids. I think this may be the last year we get to enjoy the nice cool theater. At least there is still The Voyage of the Little Mermaid to watch inside on a hot day! Hopefully Danielle is now old enough not to be scared by Ursula and the eels.